We don’t always have the luxury of customizing a space exactly how we see it in our heads. Open floor plans, high ceilings, oversized windows…not always a possibility. Even if those were do-able, you may not want to put yourself through what could turn out to be, a construction nightmare. Money, time, patience (or lack thereof) all come into play and sometimes, you just have to work with what you have. The good thing is – often times when you’re forced to work with what you have, you’ll find that what you have, can actually work.
My husband and I were gifted a small dose of “You can’t always get what you want” as our home kindly offered up a “small space” challenge of its own – the dreaded “porch turned interior room” project. Our little, extra room. I wanted to view it as a bonus but it actually felt more like a burden. What would its purpose be? A den, an office, a sad excuse for a library in a home where the word itself simply sounds ridiculous?
We’re certainly not the first homeowners to tackle a tiny space. Tiny, we could handle but tiny and overlooked or not usable, I could not. The room is tucked away behind our living room and my first concern was, how can it be useful or inviting if no one noticed it was even there? Frustrated by this thought, my goal right then and there became to make it enticing by way of intrigue. I vowed to make the room intriguing, usable and of course, beautiful. And so followed a course of action based on intrigue, purpose and beauty – three things I want to have when I grow up. 😉
Step 1: Choose Room Color
With all our rooms, choosing the paint color came first. This room has ample natural light so even dark wall colors would have sufficed but I chose to maximize the already light and bright by choosing a nice, light green – more specifically, Benjamin Moore – Aganthus Green
Step 2: Choose Room Mood
Unlike with people, you can choose the mood of your room. I quickly convinced myself that this is indeed, a bonus room – a space to do anything we want including one or all of the following (probably not simultaneously): read, relax, nap, peruse the internet, reminisce over photos, flip through magazines, write, dream, work and the occasional push-up.
Step 3: Furnish the Room
I asked myself, “What might be helpful when doing one or all of the above?” A work space or desk (to write, work or peruse the web), chairs OR a couch (to relax, read or nap), a bookcase (to store all the books and pictures), a floor lamp (to see), a vintage rung ladder (for the occasional magazine) and a throw (to keep one comfy while doing all of it OR just because I want one).
Let’s break down how checking off this list went:
DESK
Finding a desk was challenging. Once again, my Pinterest board built dreams that became crushed after my actual “search to purchase” activity and I came up empty. Fortunately, I was able to find many a tutorial on how to make the desk I envisioned and it turned out to be not overwhelmingly hard.
To make our desk:
1.) Decide on measurements.
2.) Go to your favorite hardware store. Mine happens to be Home Depot. Choose your boards and have them cut to size.
3.) Purchase stain of choice, metal connectors and screws.
4.) Lightly sand edges & surface.
5.) Stain and allow to dry fully.
6.) Lay boards out on a work surface spaced to your liking and enlist someone to assist holding in place for attaching.
7.) Get over your need for everything to come out perfect. (I’m constantly working on this)
8.) Attach the hairpin legs. I ordered mine from www.hairpinlegs.com


SEATING
A couch won out over chairs but choosing the right size couch was aggravating because the size we wanted, would not fit through our front door and we were forced to downsize, compromising a bit on the style.
Tip #1: Triple check the measurements of the door it will be coming through before making the purchase.
Furniture is not like clothes. You can’t try it first and so despite measuring numerous times, I still held my breath up until the moment it made it safely through the threshold. However, fitting through the front door is not the only success you need. It also needs to look appropriate in its intended space, which for us turned out to be a big fail. Even this smaller version couch looked way too big where we planned for it to go. It protruded too far into the belly of our room, leaving little space to do that one push-up.
Tip #2: Always have a back-up plan.
Unfortunately, swapping it with our living room couch (which was my back-up plan), did not work.
Tip #3: Always have a back-up to your back-up plan.
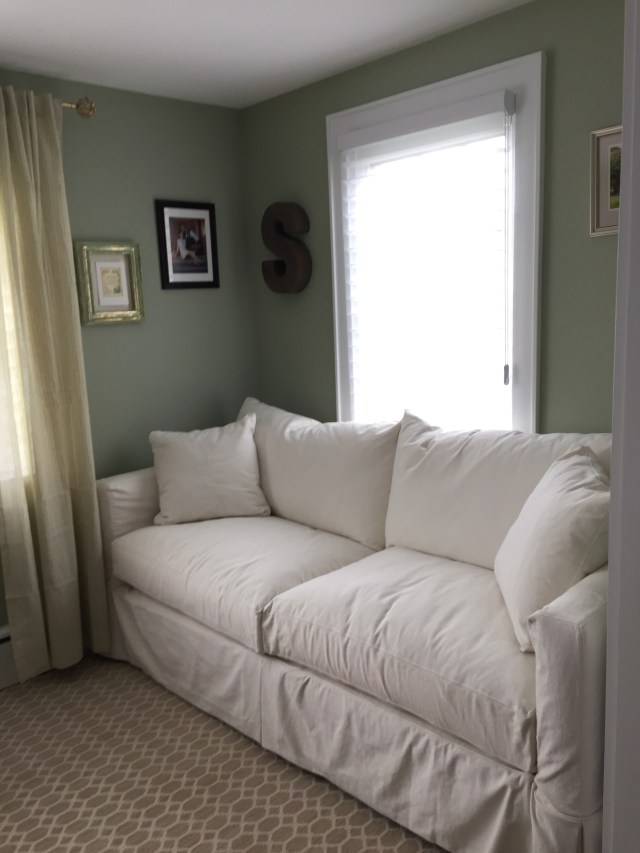
This tip was not just an afterthought. I did, in fact have a Plan C. And it did in fact work, sliding perfectly into the nook on the far wall completing my vision of that inviting space. What’s more inviting than a comfy looking couch? My husband proves that nothing is. 😉
LIGHTING
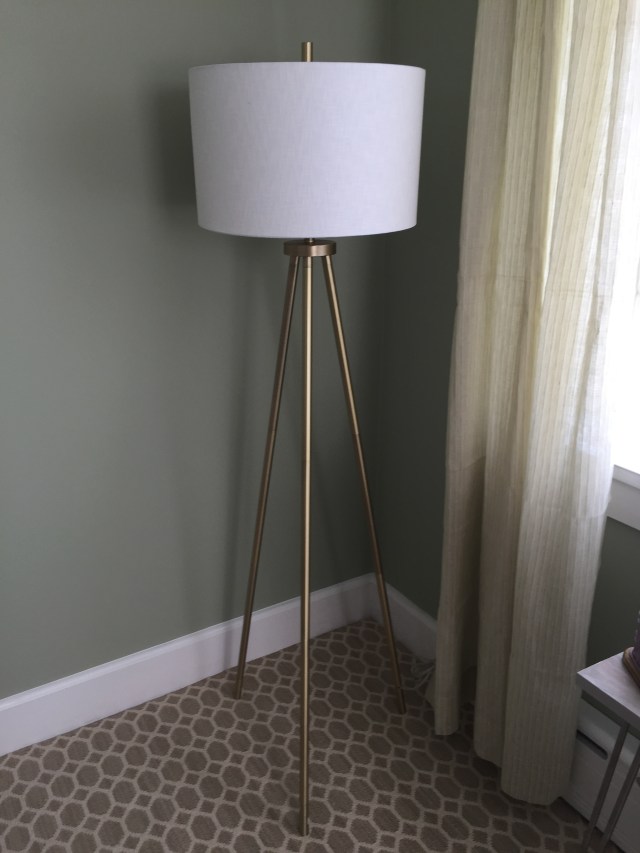
As I mentioned, this room gets ample light during the day but at night, you’d trip over yourself. Enter, floor lamp. I really craved one from Crate and Barrel but I opted for the cheaper Target version, which does the job just the same and still makes me smile.
Some finishing touches included curtains, which were hung with our old apartment rods (sprayed gold) and a mini display of some photos and other artsy decor.


*Framed stamp collage made by me but stamps courtesy of Grandma & Grandpa’s travels.


*Typewriter, courtesy of my mom’s younger days.
“I’m not a beauty but I’m pretty.
I’m not a genius but I’m witty.”

*Dining Room chair turned desk chair, courtesy of World Market.
I also became obsessed with a recycled pallet project that I had seen on pinterest and just had to make it. It was work and I ran into some trouble getting the right coloring on the wood but the end result is close to what I was hoping for and it was a cheap project overall.
Free pallet courtesy of a Facebook search
Existing mason jars colored with mod podge, blue food coloring & my oven
Faux flowers from Michaels
Pipe clamps from Home Depot
Some nails & screws
Stain
Sandpaper


Still missing – a rung ladder but otherwise…..voila! A room we rarely use.


